Showing posts with label Terminator. Show all posts

Wednesday, January 29, 2014

Crazy cows

Aside from my beloved Scions of Baal and Sons of Titan, I've recently been delving into the Minotaurs chapter.  These guys are rather psychotic and a whole lot of fun to paint and play.


Sunday, April 08, 2012

Step by step of a Blood Angels Terminator with the new GW paints

This was a rather rushed paint job in order to just illustrate how the new GW paints work when painting red for Blood Angels.  The new paints create a much more gradient approach to painting minis.  Whereas previously you had to do some mixing of paints to create certain gradient colors, but the new paints offer pre-made increments that make the process relatively straight forward.

My previous process was to use Mechrite Red as the Foundation paint, Blood Red as a base, shaded with Devlan Mud wash, then re-highlighted with Blood Red.  The next highlight was done with Blazing Orange then an extreme highlight with Vomit Brown concluded with a watered down Baal Red wash to re-center the blends.

With the new paints the process went as follows:

1. Assembled the Terminator


2. Primed with Chaos Black primer


3. Base coated with Mephiston Red Base. This base paint is a little different in hue that Mechrite Red. It's closer to the former Blood Red than it is Mechrite Red.


4. A coat of Wild Rider Red was used to 'redden' the hue a little more.  This gave it a slightly orange tone.


5.  Carroburg Crimson was then used to shade the model.  This color is between Baal Red and Devlan Mud. IT is a much more appropriate shade for red models like Blood Angels.


6.  Wild Rider Red was then used to re-layer the raised surfaces.


7.  Wazdakka Red was then layered in smaller areas.


8.  Troll Slayer Orange was then used to highlight the raised surfaces.


9.  The Drybrush paint Eldar Flesh was used to drybrush the edges.  Normally this would've been layered by Vomit Brown but the drybrush paint seemed a bit more apropos.  I would've loved to have used Kindleflame which is recommended by GW but I forgot to pick up a pot and they're closed on Easter.


10.  Finally, Bloodletter Glaze was used to tone down the highlights and re-center the colors.

Thursday, March 22, 2012

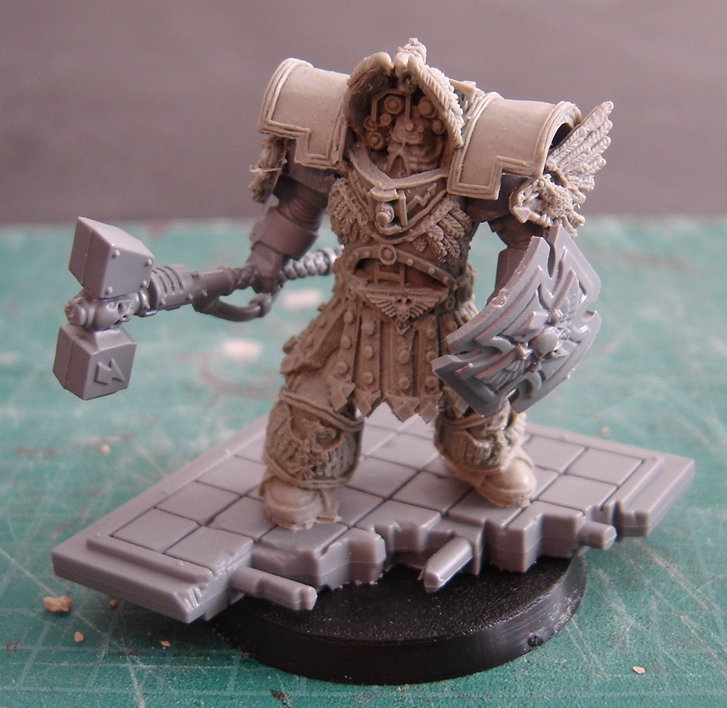
Custodes Terminator

After looking high and low for one of these rare models, I was finally able to get my hands on a Legio Custodes Terminator model.


It'll serve no purpose in my army but will just look really cool with the rest of my Pre-Heresy minis.

Thursday, March 08, 2012

Finished Blood Angels Assault Terminator

Finally finished my Assault Terminator.  This was perhaps the most technically complicated/advanced painting technique I've ever employed and I'm incredibly happy with the results.  The red alone was an eleven-step process.  The Crux Terminatus on his left shoulder was an 9 step process.  Even the gold trimming on the shield, hammer, belt, and wrists were a four-step process.  While the quality comes nowhere near the 'Eavy Metal level, it was interesting to follow in one of their painter's footsteps and use their techniques.

The only thing I’m disappointed in is the gloss factor in the photos.  I used a brush on matte coating and it came out a little glossy and not sure why when in-person it’s actually pretty matte.

There's no way in hell I'd use this for every single mini, otherwise it would take me months just to paint a single squad. As it is, I've spent close to 60 hours on this guy.

For the red armor:
1. Primed black
2. Base coated 1:1 Dark Flesh/Blood Red
3. 2:1:1 Chaos black/Dark Flesh/Blood Red watered down and added to the recesses
4. 3:1 Blood Red/Dark Flesh layered on to the armor, avoided the shaded areas
5. Pure Blood Red was then layered into the much more prominent areas of the armor
6. Pure Blazing Orange used as a highlight to the armor panels
7. 2:1 Blazing Orange/Vomit Brown was used for edging/extreme highlighting
8. Watered down Baal Red wash was used to re-center the layers and tone down the gradients
9. 2:1 Blazing Orange/Vomit Brown was then re-applied to the highlighting in a thinner edge.
10. This resulted in a very dark red model so I then mixed 4:1 'Eavy Metal Matte Medium/Blood Red and applied it as a glaze to brighten it up.
11. Blending again 2:1 Blazing Orange/Vomit brown

For the Crux Terminatus:
1. Primed black
2. 1:1 Chaos Black/Scorched Brown leaving the recesses black.
3. Wash of 1:1:1 Scorched Brown/Chaos Black/Badab Black liberally applied.
4. Codex Grey layered on over the raised areas.
5. Fortress Grey then used as a midtone.
6. Highlights with Deneb Stone.
7. Highlights with 2:1 Deneb Stone/Skull White.
8. Highlights with 1:1 Deneb Stone/Skull White.
9. Edging with pure Skull white.

For the gold parts:
1. 1:1 Scorched Brown/Shining Gold.
2. Washed with 1:1 Scorched Brown/Chaos Black.
3. Layered on Shining Gold to the raised surfaces.
4. Layered Burnished Gold on to the highlights.


5. Mithril Silver was used sparingly just on the most prominent parts.

Monday, March 05, 2012

'Eavy Metal style of Blood Angels

My normal method of painting red on my Blood Angels has been pretty formulaic.  If I need quick results, I'll use Army Painter's Pure Red, then shade with Devlan Mud then highlight with Blazing Orange then Vomit Brown.  If I wanted quality results, I'll prime black, then gradually layer Blood Red. I'll then drench it in Devlan Mud then gradually build up Blood Red layers followed by Blazing Orange, Vomit Brown, then re-adjust the hue with watered down Baal Red.

I wanted to try some 'Eavy Metal style of painting so I used Anja Wettergren's method of painting Blood Angels Terminators from the October 2009 issue of White Dwarf feature the 3rd edition of Space Hulk.  I improvised a little more and added a couple extra steps (steps 10 and 11 were not in the original tutorial).

1. Primed black
2. Base coated 1:1 Dark Flesh/Blood Red
3. 2:1:1 Chaos black/Dark Flesh/Blood Red watered down and added to the recesses
4. 3:1 Blood Red/Dark Flesh layered on to the armor, avoided the shaded areas
5. Pure Blood Red was then layered into the much more prominent areas of the armor
6. Pure Blazing Orange used as a highlight to the armor panels
7. 2:1 Blazing Orange/Vomit Brown was used for edging/extreme highlighting
8. Watered down Baal Red wash was used to re-center the layers and tone down the gradients
9. 2:1 Blazing Orange/Vomit Brown was then re-applied to the highlighting in a thinner edge.
10. This resulted in a very dark red model so I then mixed 4:1 GW Matte Medium/Blood Red and applied it as a glaze to brighten it up.
11.  From there I reapplied Blazing Orange from Step 6 and then the edging highlight from Step 7.

The result is an absolutely gorgeous model.  I don't dare say I can even come close to Anja's quality of painting, but following in her footsteps at least gives me an idea the lengths these artists go to in order to paint obscenely beautiful minis.

Apologies for the poor quality image as I took the photo at my desk at work.  Will provide a better one later.